Installing Certificates on Surface Hub
Machine Certificates
There are two ways to install machine certificates on the Surface Hub.
- Create a device configuration profile within Microsoft Endpoint Manager to deploy certificates remotely.
- Build a USB provisioning package containing necessary certificates and install it through Settings.
User Certificates
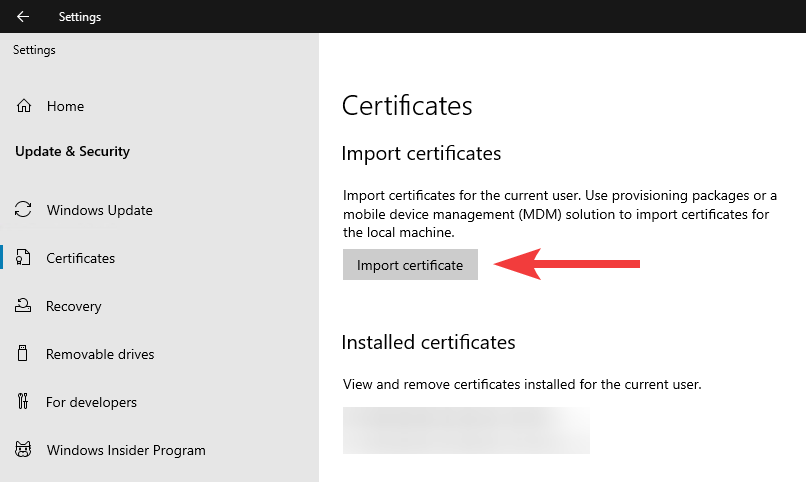
To install certificates to the user store, copy the certificate to a USB drive, insert it into the Surface Hub and navigate to Settings > Updates and Security > Import Certificate.

Provisioning Package
Provisioning packages install certificates to the local machine store. They are created using the Windows Device Configuration Designer (WDCD) on a Windows 10/11 PC.
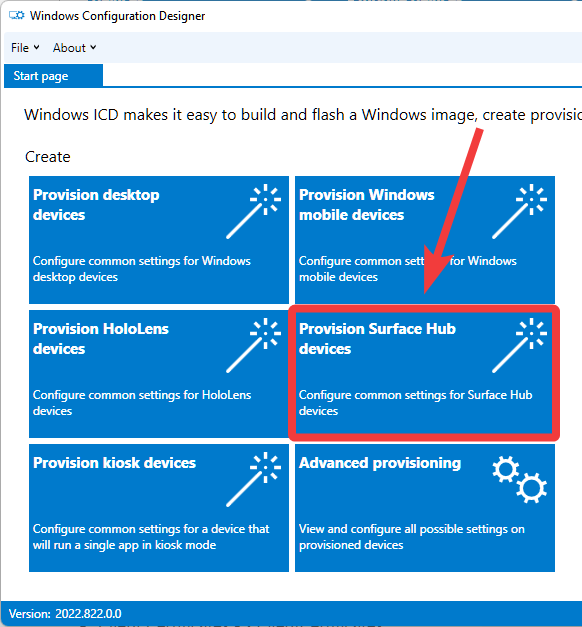
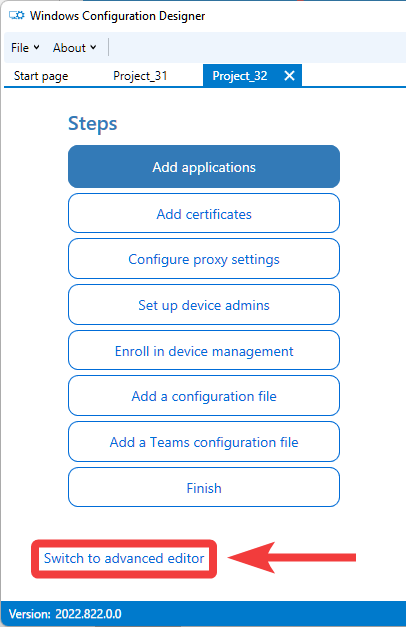
After installing and opening WDCD select Provision Surface Hub devices. Name the project and then click Finish. Then switch to the advanced editor.


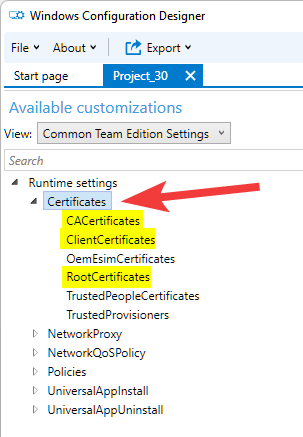
Within the advanced editor, expand Runtime settings and then Certificates. Place certificates in the following locations:

| Certificate Type | Provisioning Package Location | Device Store |
| Root Certificate | RootCertificates | Machine store |
| Intermediate Certificate | CACertificates | Machine store |
| Client Certificate | ClientCertificates | Personal store |
After adding the certificates to the package, click Export at the top and then Provisioning package. Follow the remaining prompts to build the package.
Install Provisioning Package on Surface Hub
To install the .ppkg provisioning package on the Surface Hub copy it to the root of a USB drive. Insert the drive into the Surface Hub and go to Settings > Surface Hub > Device Management > Add or remove a provisioning package. Select the package from the USB drive and install it.
Demo
This video demonstrates how to add root and intermediate certificates to a provisioning package. After building the package it is tested on a Windows 10 PC to ensure the certificates are successfully installed and placed in the correct stores.
